Sourdough Starter (All-Purpose Flour)
This post is also available in / Esta entrada también está disponible en ESPAÑOL (SPANISH)
So, you want to make your own sourdough starter? Welcome to the world of bubbly jars and naming your starter like it’s a new pet. (Trust me, you’ll get attached. Mine’s called Dolly (Doughly Parton, to be exact.)
This guide will walk you through the process step by step—no fancy equipment, no complicated methods, and best of all, no waste. If you’ve been curious about sourdough but felt intimidated by the idea of maintaining a starter, don’t worry. We’re keeping things simple and practical!

In about 10-15 days, you’ll have a strong, active starter ready to bake all kinds of delicious sourdough bread. Since this is made with all-purpose flour, the process might take a bit longer to build strength—but I’ve designed it to be as stress-free and accessible as possible.
In a future post, I’ll share my basic sourdough bread recipe and tips on keeping your starter happy and thriving.
Let’s get started!
Kitty
All-Purpose Flour Sourdough Starter
What You’ll Need:
- 1 glass jar
- A small piece of thin fabric
- A wooden or silicone spoon
- A silicone spatula
- A marker
- An elastic band or string (to secure the fabric)
- All-purpose flour (get a bag of 5lb. as you’ll end up baking bread after these 12 days)
- Filtered water (room temperature or slightly warm)
This starter is a living thing 🤭, so keep in mind a few key considerations:
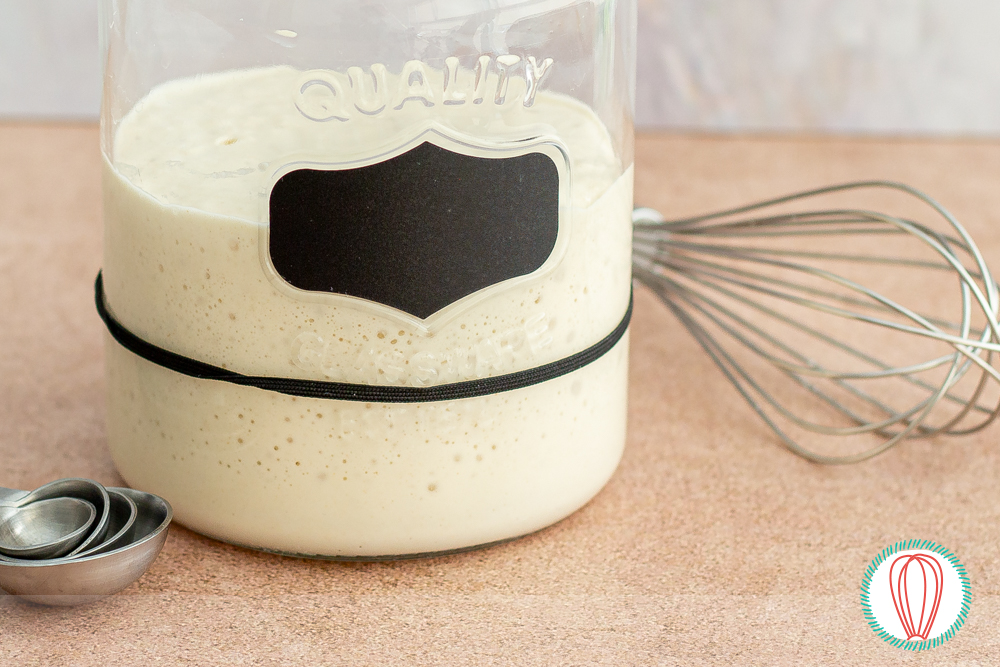
- Use a clean glass jar. I ended up using two as my starter grew beyond the first one. Nothing fancy—I got mine at the dollar store.
- The fabric allows air circulation while keeping out drafts. Secure it with an elastic band or string.
- If your jar has a two-part lid (a ring and a separate lid), by Day 4-5, you can replace the elastic with the ring. It works perfectly!
- If using a glass lid jar, remove the rubber seal so air can still flow in.
- Wooden or silicone utensils are best. Everyone online recommended them, and who am I to argue?
- Choose a warm, draft-free spot for your starter to grow. I placed mine on the countertop where it got indirect sunlight.
- This process takes 10-15 days. You’ll feed your starter daily—ideally at the same time.
- I’m making a no-discard sourdough starter, meaning no waste during the first feeds. Later, I’ll share recipes so nothing goes to waste!
I followed @loveatfirstloaf’s tips on TikTok, plus insights from Maurizio Leo from The Perfect Loaf, and Conley Kipp @ conleyannekitchen on TikTok—both great resources for sourdough lovers.
Day 1 – 6:00 PM
- 1 tablespoon all-purpose flour
- 1 tablespoon water
Mix in a small jar and cover with the fabric. Place on your countertop for 24 hours. Nothing will happen yet, but mark the jar with a marker to track any changes. Clean the sides of the jar to ensure all the flour and water get incorporated.
Day 2 – 6:00 PM
You won’t see much change—don’t worry!
- Starter
- 1 tablespoon all-purpose flour
- 1 tablespoon water
Add the flour and water, mix well, and clean the sides. Adjust the mark and let it rest for another 24 hours.
Day 3 – 6:00 PM
Still no visible activity, which is normal. Maybe some bubbles start forming. Maybe.
- Starter
- 2 tablespoons all-purpose flour
- 1 tablespoon water
Mix, clean the sides, and cover. Adjust the mark.
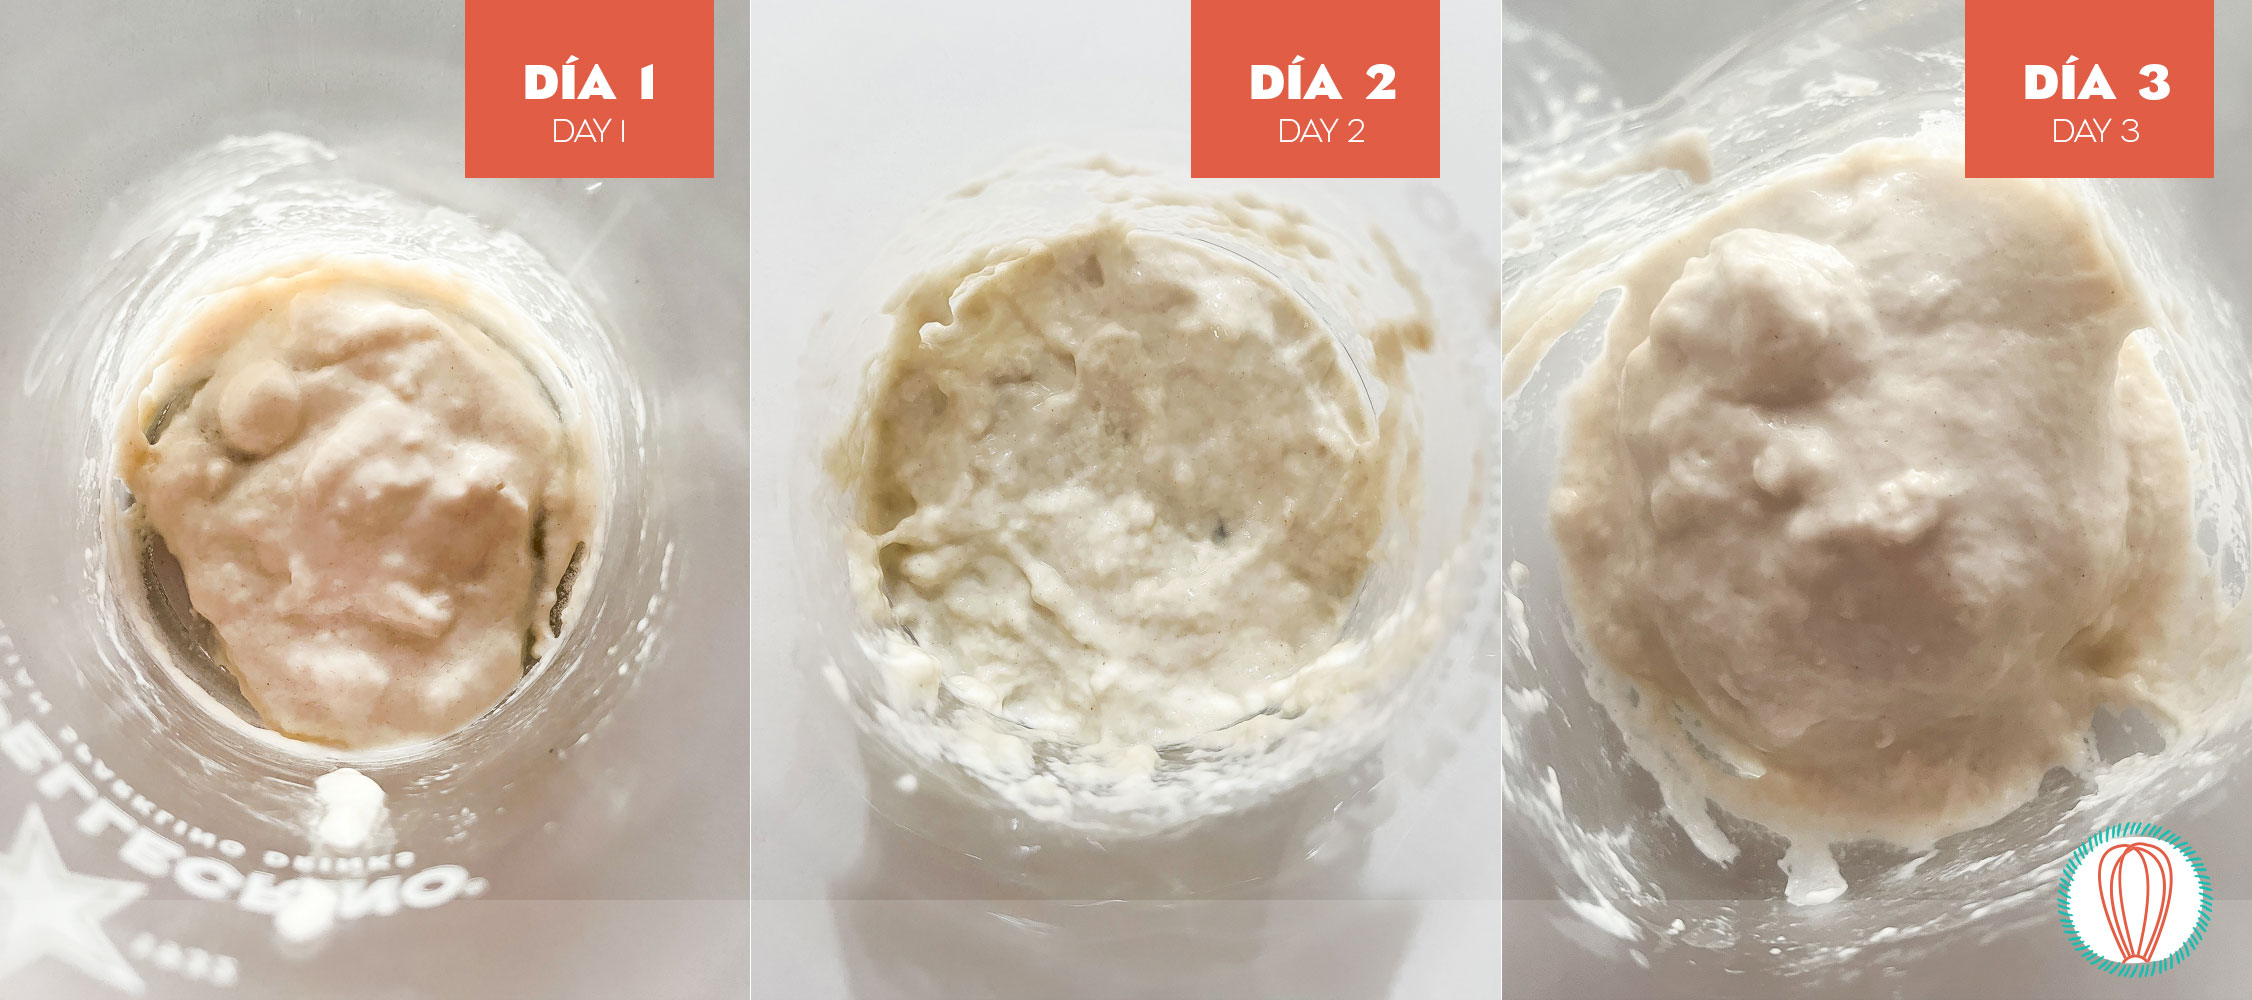
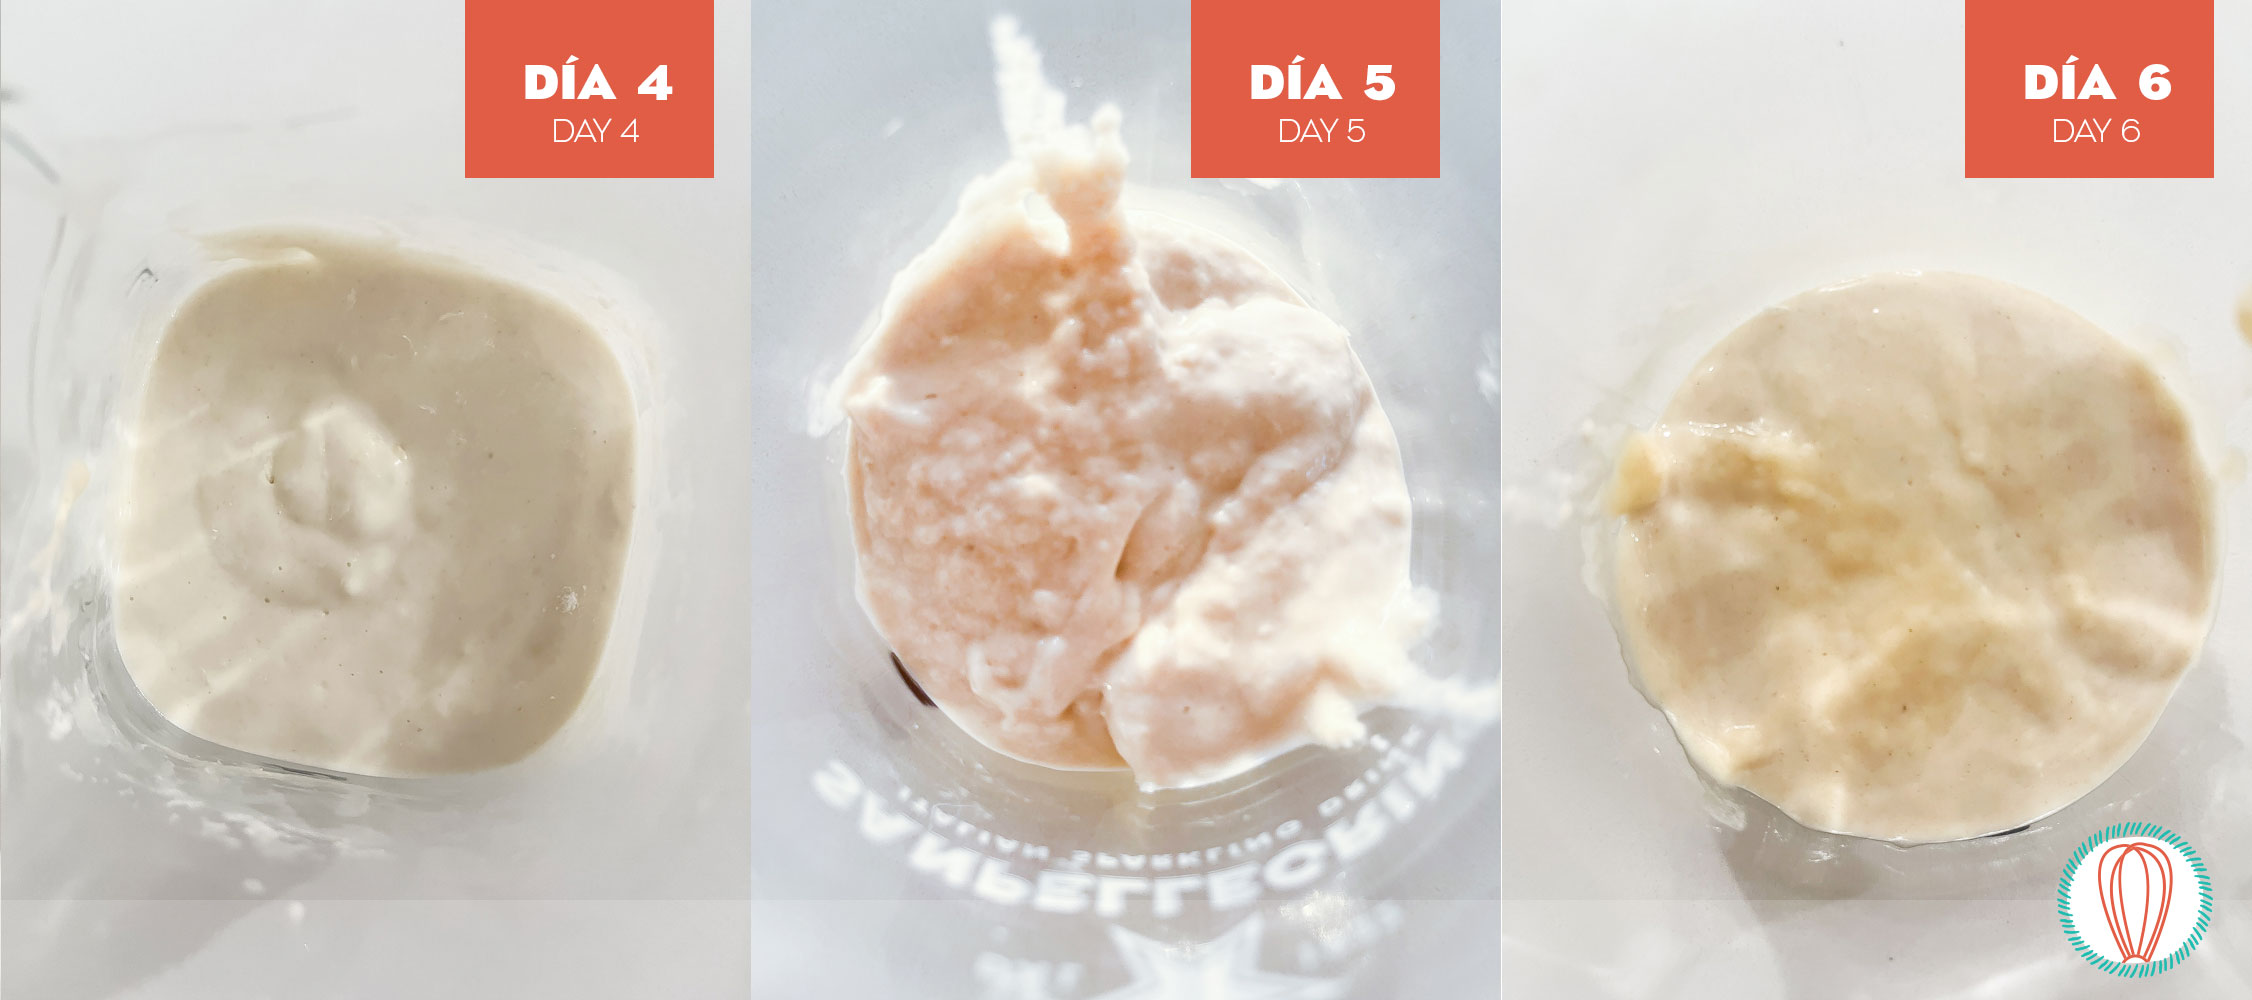
Day 4 – 6:00 PM
First signs of activity! The starter may look more liquid—this means it’s hungry.
- Starter
- 2 tablespoons all-purpose flour
- 1 tablespoon water
Mix well, cover, and adjust the mark.
Day 5 – 6:00 PM
If it looks like Day 3, don’t worry—it’s normal.
- Starter
- 2.5 tablespoons all-purpose flour
- 2 tablespoons water
Mix, clean the sides, and cover.
Day 6 – 6:00 PM
You might start seeing bubbles at the bottom!
- Starter
- 2 tablespoons all-purpose flour
- 3.5 tablespoons water
Mix, clean the sides, and cover.
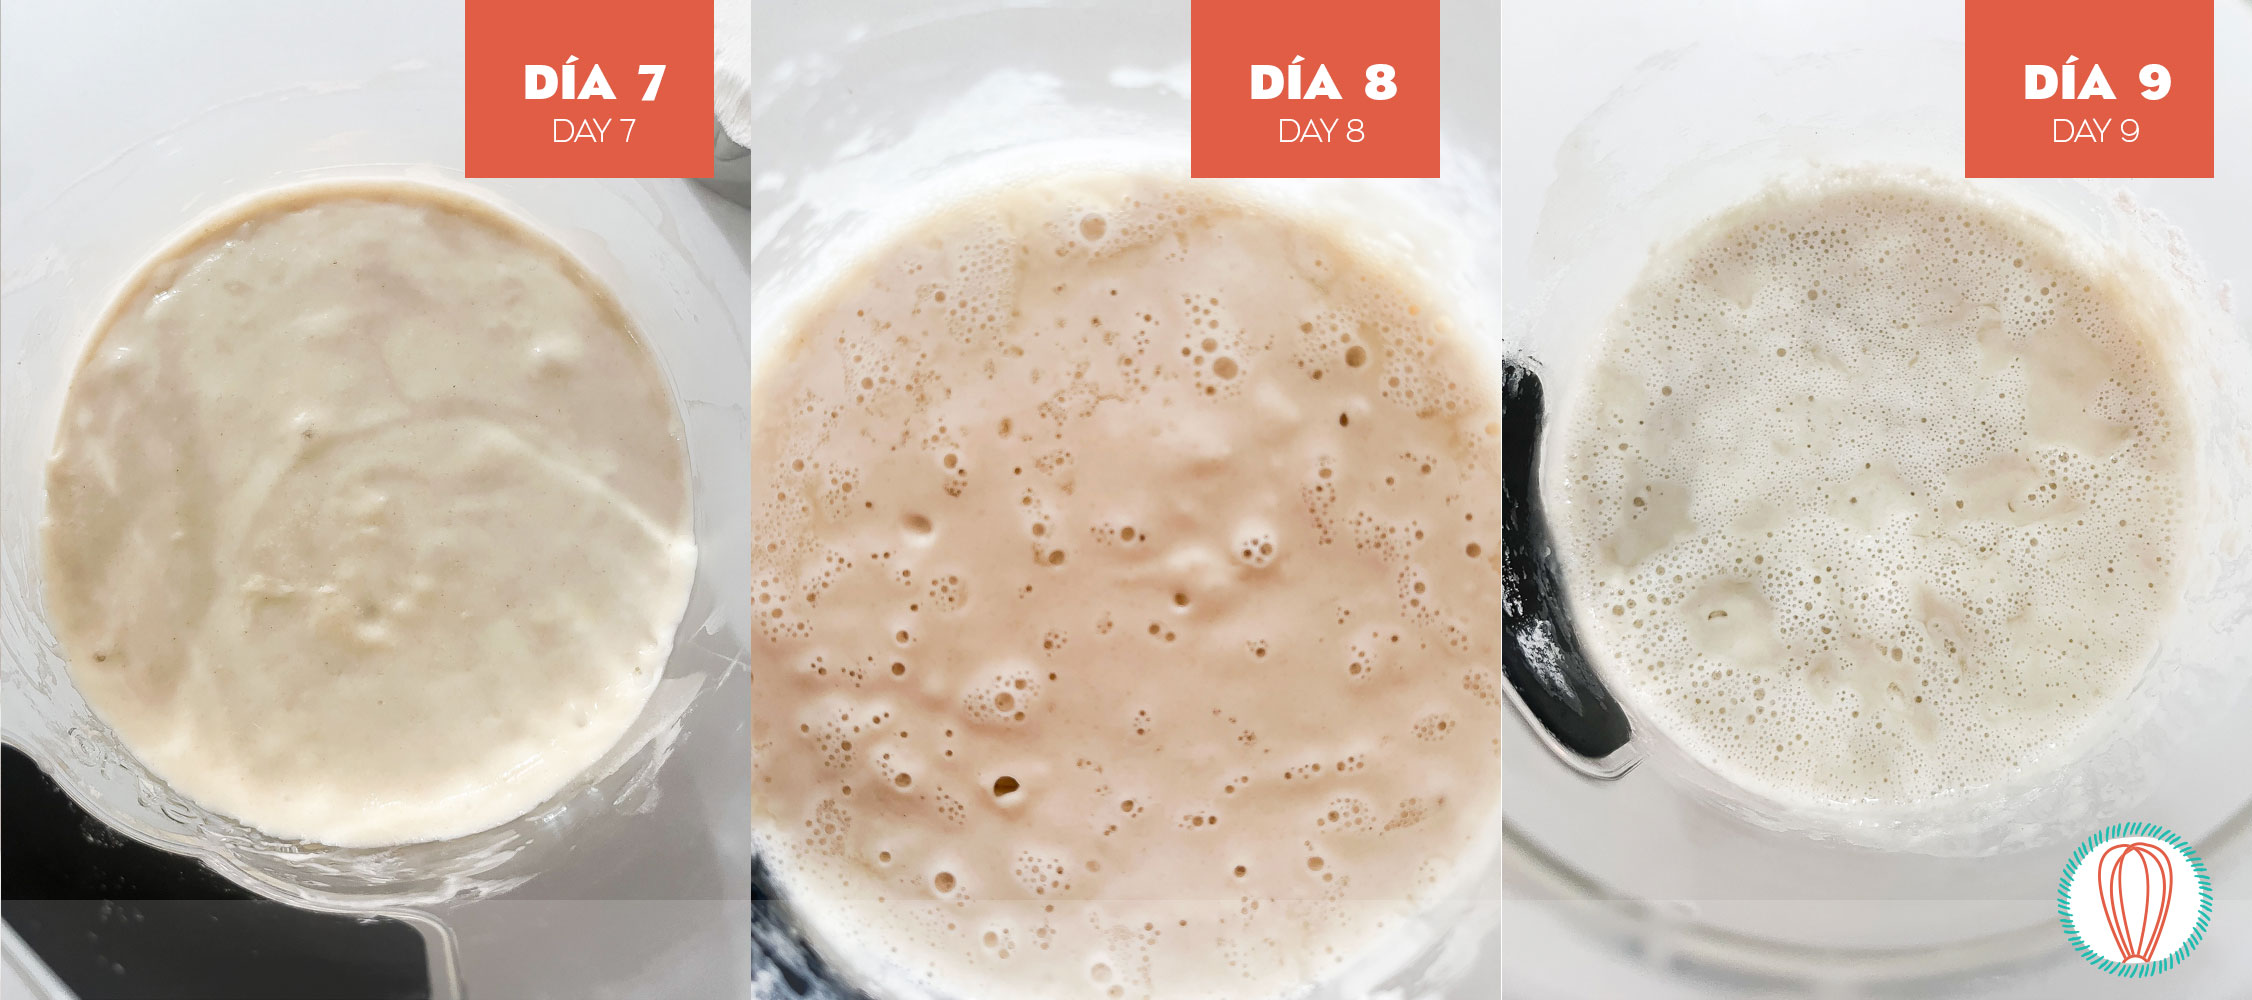
Day 7 – 6:00 PM
Bubbles! I moved my starter to a bigger jar. Today, she got a name: Dougly Parton (Dolly for short).
- Starter
- 5.5 tablespoons all-purpose flour
- 4 tablespoons water
Mix, clean, cover, and adjust the mark.
Day 8 – 6:00 PM
Dolly is thriving! You’ll see she rises and falls—this is normal.
- Starter
- 1/2 cup all-purpose flour
- 4 tablespoons water
Mix, clean, cover, and adjust the mark.
Day 9 – 6:00 PM
Time for an aggressive feeding to prepare for baking.
- Starter
- 1/2 cup all-purpose flour
- 1 tablespoon water
Mix, clean, cover, and adjust the mark.
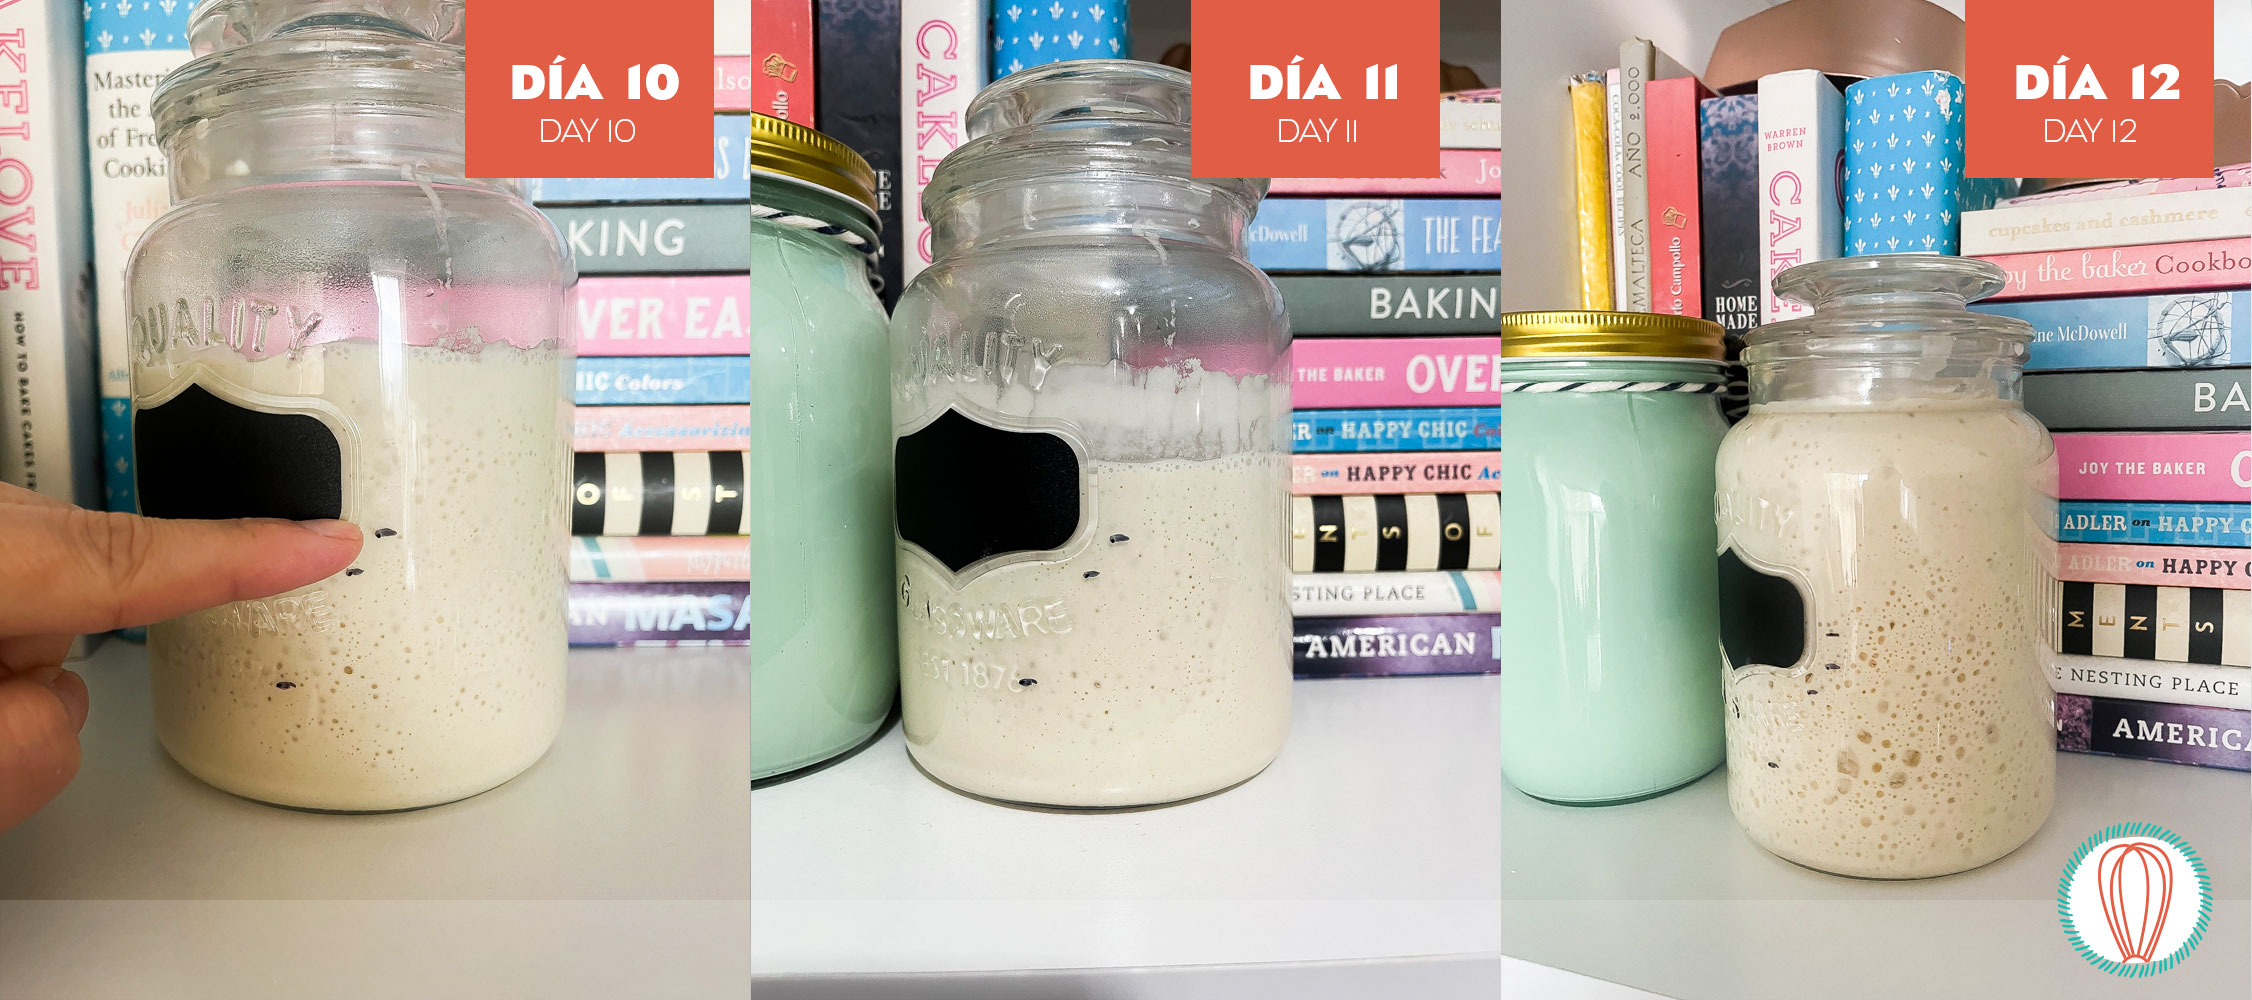
Day 10 – 6:00 PM
Dolly doubled in size! To check if your starter is ready, drop a bit into water—if it floats, it’s ready. My starter doubled but sunk in the morning on day 11. So since Dolly wasn’t quite there yet, so I repeated yesterday’s feeding.
- Starter
- 1/2 cup all-purpose flour
- 1 tablespoon water
Mix, clean, cover, and adjust the mark.
Day 11 – 6:00 PM
Ready to prep dough for baking! If you’re not baking daily, you can store the starter in the fridge after a smaller feeding.
- Starter
- 2 tablespoons all-purpose flour
- 2 tablespoons water
Mix well, transfer starer to a smaller jar, and seal with a lid (not fabric). Store in the fridge.
Day 12 – Bake Day
… to be continued! I’ll share the recipe for a Basic Sourdough Loaf.
When You’re Ready to Bake Again
Take the starter out of the fridge and let it warm to room temperature. If there’s liquid on top, don’t throw it out—it just means the starter is hungry. Stir before feeding.
- Starter (at room temperature)
- 1/2 cup all-purpose flour
- 4 tablespoons water
Mix, clean, cover, and adjust the mark. Let it rest for 24 hours before using.

Have you made this recipe?
Please let me know how it turned out for you! Leave a comment below and share a picture with the hashtag #thefoodieskitchen!
Want more?
You can subscribe to our newsletter and we’ll send you the monthly recipes! You can also keep up to date on Facebook, Threads, Instagram, Pinterest or Tumblr.
© 2025, The Foodies’ Kitchen. All rights reserved | Todos los derechos reservados
This post is also available in / Esta entrada también está disponible en ESPAÑOL (SPANISH)


Comments (1)
Sourdough Bread Loaf (All-Purpose Flour) – The Foodies' Kitchen
April 11, 2025 at 5:42 pm
[…] to our bread making adventures! This is where we make the bread! So, if you’ve already made your Sourdough Starter with All-Purpose Flour and reached day 11 or 12, you’re ready to bake your first […]