Little Foodies: Bunny Ears Easter Cookies
This post is also available in / Esta entrada también está disponible en ESPAÑOL (SPANISH)
We love sugar cookies, and we have our go-to recipe which we love to use for the holiday season. However, our recipe does yield a lot of cookies, sometimes we keep half of the dough in the freezer! This time, we wanted to try easter cookies recipe that would make enough for one sitting… just one “stay at home, bake a few cookies and finish them all in one day” recipe.
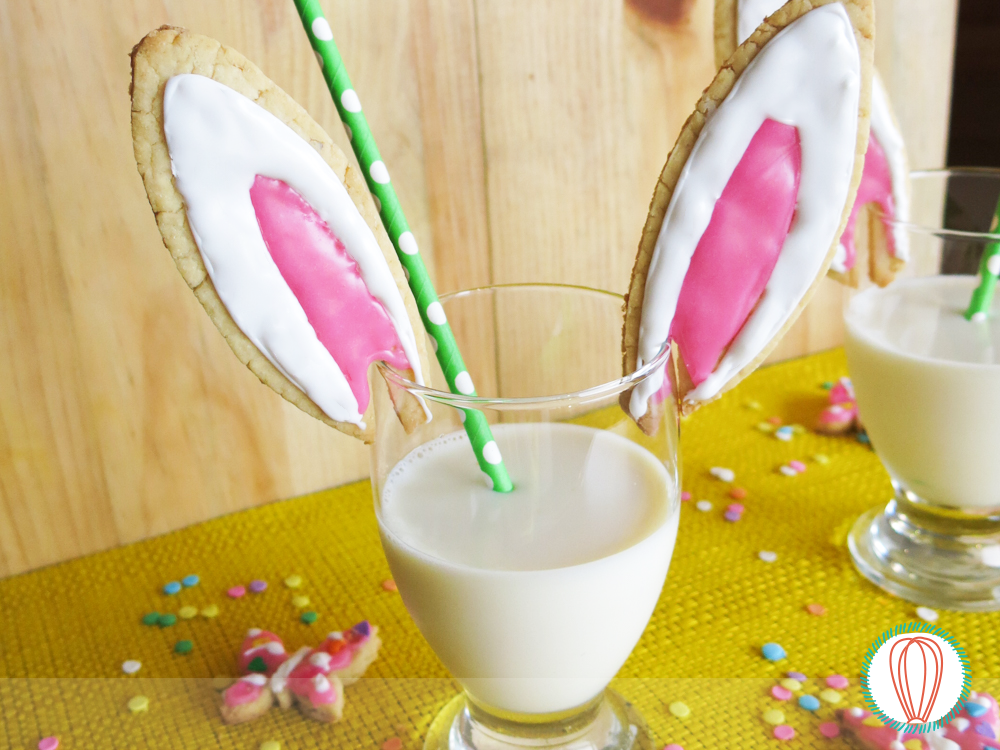
We went to Christina Lane’s Dessert for Two as she has an amazing selection of small batch recipes, which I had been curious to try. The recipe for sugar cookies is great! I ended up with 6 bunny ears and a few butterflies, enough for one afternoon snack, which is exactly what I wanted. Her recipe actually yields 1 dozen cookies, if you make them in a regular size. We loved the bunny ears template by Nicola from Next to Nicx.
Since we made these with my daugher, and she really wanted to use the icing to decorate the cookies, we decided to use store-bought icing in white and pink colors. If you want to make your own royal icing, we have a great recipe here. Let the cookies dry out completely before placing them on top of milk glass, so it’s better if you decorate the cookies a day in advance.
Helga
Bunny Ears Easter Cookies
Recipe from Dessert for Two
Makes 6 bunny ears or 12 regular-size cookies
Ingredients:
¾ cup flour, plus extra for rolling
½ teaspoon baking powder
pinch of salt
¼ cup unsalted butter, softened
¼ cup sugar
1 egg yolk
½ teaspoon vanilla extract
⅛ teaspoon almond extract
White cookie icing
Pink cookie icing
Wax paper (to trace the template)
Preparation:
- Whisk together the flour, baking powder and salt in a small bowl and set aside.
- In separate a medium bowl, beat together the butter and sugar with an electric mixer. Once light and fluffy, add the egg yolk and extracts.
- When they are well incorporated, sprinkle over half the flour mixture and beat gently until combined, then sprinkle over the rest and beat until no streaks of flour remain, and be careful not to over-mix. We prefer to finish mixing by hand.
- Prepare your counter top with flour, and place the dough. Gather it into a ball and press it into a 2-inch thick round disk. Flour your rolling pin and roll out the dough to almost ½-inch thick (so they don’t break when you place them on the glass) and cut out the bunny ear shapes using the template.
- Preheat the oven at 350°F. Place the shapes on a baking sheet lined with parchment paper or a silicone mat, place them in the freezer for 10 minutes before baking them. This will help you keep their shape. Gather the dough scraps and re-roll to cut out the rest of the shapes and place them on the cookie sheet.
- Bake the cookies for 10-12 minutes, until the edges of the cookies just start to turn brown. Let them cool on the cookie sheet a few minutes, then transfer to a wire rack to cool completely.
- Once the cookies are completely cool, you can ice the cookies by outlining the ears’ shapes first, then flood the icing within the borders to fill it in with white in the outside and pink on the inside. Let the cookies dry overnight before serving.
To download a printable version of this recipe, click below!
Download Printable
Have you made this recipe?
Please let me know how it turned out for you! Leave a comment below and share a picture with the hashtag #thefoodieskitchen!
Want more?
You can subscribe to our newsletter and we’ll send you the monthly recipes! You can also keep up to date on Facebook, Twitter, Instagram, Pinterest, or Tumblr.
© 2017 – 2020, The Foodies’ Kitchen. All rights reserved | Todos los derechos reservados
This post is also available in / Esta entrada también está disponible en ESPAÑOL (SPANISH)


