Guest Foodies: Seth Mariscal & Baked Ribs
This post is also available in / Esta entrada también está disponible en ESPAÑOL (SPANISH)
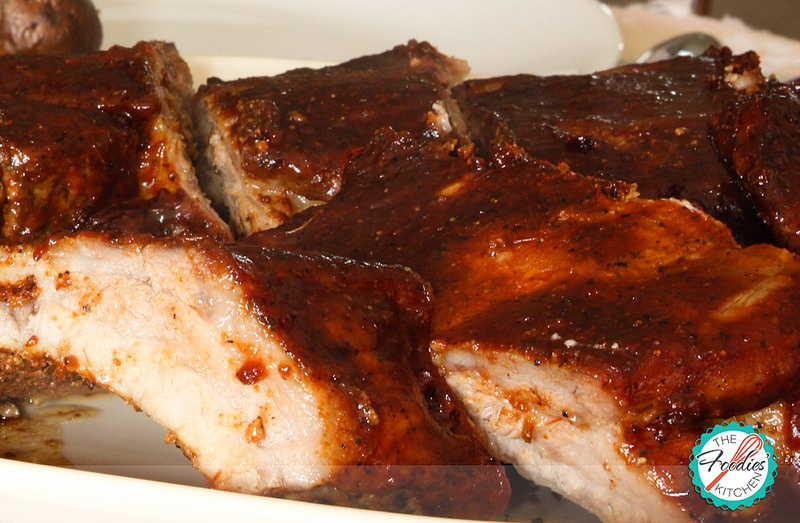
We are thrilled to share this bit of news with you all! Our Guest Foodie today is Seth from The Nutty Food Lover! We’ve know Seth for quite a while now. Kitty went to school with him quite a few years ago, and they have always remained in touch. Seth and his wife Susan moved to Lancaster, PA about a year ago and why we didn’t think about Seth being a Guest Foodie until now, we have no clue. But, being a Guatemalan that loves food as much as we do, it is a perfect fit. His wife Susan is a very talented designer and photographer. You can check out her graphic design portfolio at her business page Andie.M Design and her amazing photography at De Susan: Photo Diary. Now, lets talk food! Seth prepared these delicious Baked Ribs in PA and he has us wishing we could just jump in a plane and go grab dinner at their place. They look delicious, don’t you think?
Kitty & Helga
A little introduction from Seth: For me nothing goes better with good weather than BBQ and nothing says BBQ quite the way a rack of baby back ribs do. Sometimes, though, I can’t quite get the grill going and last week was one of those times. We bought this beautiful rack but forgot to buy coal so I decided to turn to the oven and bake them.
Seth from The Nutty Food Lover
Guest Foodies: Seth Mariscal & Baked Ribs
Recipe by Seth Mariscal from The Nutty Food Lover
Ingredients:
2 lbs. of Pork Ribs
Mustard
4 tablespoons of paprika
2 tablespoons of salt
2 tablespoons of Brown Sugar
2 tablespoons of onion powder
2 tablespoons of ground black pepper
1 tablespoon of cayenne pepper
Directions:
- Make sure you have your ingredients for the dry rub. I like to start preheating the oven to 225 F at this point and line a baking sheet with tin foil.
- Once you have your dry rub assembled its time to prepare your rack. First step is to remove the membrane on the back, over the bones. Just take a butter knife and separate a corner. Grab it with a paper towel for a better grip, and pull it away. It should come away in one big piece. Next you’ll want to blot it dry before applying the rub.
- As a base for the rub, pour some mustard and spread it all over the entire rack. As the name implies, you’ll want to sprinkle on the rub and then rub it in. I use gloves for this part, it just makes it easier to really get in there.
- Next cover the ribs with tin foil and place in the oven for 3 hours. While that’s going, it gives you plenty of time to clean up, get sides ready and make your BBQ sauce if you’re so inclined. I haven’t really found a recipe that I’ve liked more than what I buy so I just use that. When the ribs come out, the rub will be moist since the ribs have been steaming. Remove the tin foil and put back in for another 30 minutes at 375 F. This will make the crust get a better consistency.
- At this point you have two choices, you can make dry ribs or wet ribs. If you want to make dry ribs you’ll be done at this point. My wife prefers wet ribs so at this point I baste the ribs with the BBQ sauce and out back into the oven. Think of it like painting. You apply one layer, let it dry and then apply the next. I apply about 3 or 4 layers before serving.
- As with most meats, remember to let it rest for a few minutes to allow the juices to thicken so they won’t just spill out when you cut them. I hope you give these ribs a try and let me know how it goes!
© 2013 – 2020, The Foodies’ Kitchen. All rights reserved | Todos los derechos reservados
This post is also available in / Esta entrada también está disponible en ESPAÑOL (SPANISH)


