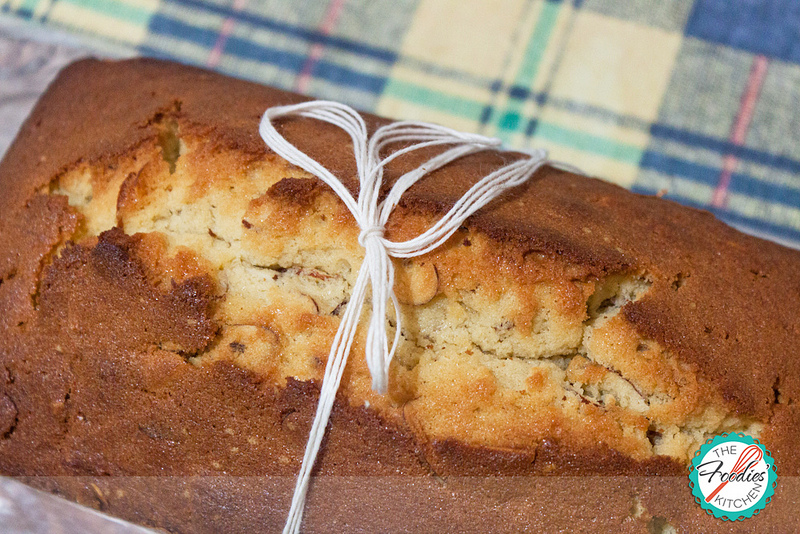
Brown Sugar Maple Pound Cake
This post is also available in / Esta entrada también está disponible en ESPAÑOL (SPANISH)
Last week was my uncle’s birthday. I had gone out to a couple of meetings early in the morning, so by the time I came back home I found a store bought cake for my uncle and I was surprised. I asked my mom why there was such cake at home, and she said it was to take over later that night next door to the birthday dinner.
Not only is my uncle a rockstar doctor in my book, but he’s really special with all of us – between house calls when we are sick and just being the cool uncle that he is (dad and grandpa too) – I didn’t want him to get a store bought cake!. I was pressed for time, so what I could manage to get out (and have it cool in time) was this pound cake. Turns out that the cake was widely accepted, but I’ll suggest you to add a tablespoon of orange juice, as it can get too dry.
Kitty
Brown Sugar & Maple Pound Cake
Recipe By Martha Stewart
Yield: 1 loaf, serves 8
Ingredients:
1 cup (2 sticks) unsalted butter, room temperature, plus more for pan
1 ½ cups all-purpose flour (spooned and leveled), sifted, plus more for pan
½ cup granulated sugar
½ cup light brown sugar
1 teaspoon pure maple syrup
5 large eggs, room temperature, lightly beaten
½ teaspoon coarse salt
1 cup of sliced almonds
Directions:
- Preheat oven to 350 degrees.
- Lightly butter and flour a 4 1/2-by-8 1/2-inch loaf pan.
- In a large bowl, using an electric mixer, beat butter and sugars on medium-high until very light and fluffy, 7 minutes. Scrape down bowl and beat 1 minute more.
- Add maple syrup, then gradually add eggs, beating well and scraping down bowl as needed. With mixer on low, add salt, then gradually add flour, beating well to combine and scraping down bowl as needed.
- Add the almonds and fold them into the batter.
- Transfer batter to pan and bake until a toothpick inserted in center of cake comes out with a few moist crumbs attached, 65 minutes.
- Let cool in pan on a wire rack, 1 hour. Remove cake from pan and let cool completely on rack before slicing.
Have you made this recipe?
Please let me know how it turned out for you! Leave a comment below and share a picture with the hashtag #thefoodieskitchen!
Want more?
You can subscribe to our newsletter and we’ll send you the monthly recipes! You can also keep up to date on Facebook, Twitter, Instagram, Pinterest, or Tumblr.
© 2013 – 2020, The Foodies’ Kitchen. All rights reserved | Todos los derechos reservados
This post is also available in / Esta entrada también está disponible en ESPAÑOL (SPANISH)


