Chocolate Cake Balls
This post is also available in / Esta entrada también está disponible en ESPAÑOL (SPANISH)
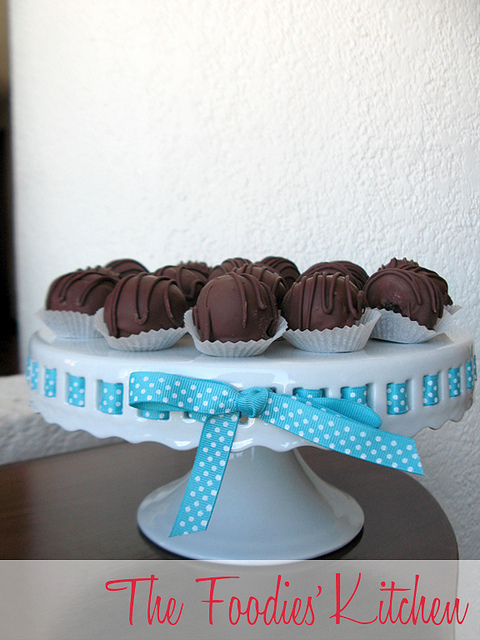
This is the best chocolate dessert I have tried in a while. Really. I had already tried to make brownie balls before, which are extremely delicious and chocolatey. But this… This is just too much. You sink your teeth into the hard chocolate covering to find a rich, moist and decadent chocolate cake filling.
I need to make more of these, with variations like… boozing them up.
If you want to give these out as Valentine’s Day gifts, remember you have to store them in a cool place so the chocolate covering doesn’t melt. Use mini cupcake liners to set them up and placing them in a nice box would be the best wrapping choice. Or, make them for yourself and enjoy them with a nice glass of Zinfandel.
Helga
Chocolate Cake Balls
Makes about 45-50
Recipe from Bakerella
Ingredients:
1 box chocolate cake mix, cooked as directed
1 16-oz. tin of chocolate frosting
8-oz. semisweet chocolate chips
wax paper
Procedure:
- After cake is cooked and cooled completely, crumble into large bowl.
- Mix thoroughly with 1 can chocolate frosting. I used a spoon to mix it all in.
- Roll mixture into quarter size balls and lay on cookie sheet. (Should make 45-50)
- Chill for several hours. (You can speed this up by putting in the freezer.)
- Melt chocolate by placing a pot over (not on) hot simmering water. Stir until it is completely melted and smooth.
- Roll balls in chocolate and lay on wax paper until firm. (Use a spoon to dip and roll in chocolate and then tap off extra.)
Tips:
- To successfully dip the chocolate balls, just drop them into the melted chocolate. Then use a spoon to cover the top of the ball with chocolate to get it evenly coated. Don’t double dip, or you might get crumbles into your chocolate.
- Once it is well coated, lift with your spoon and tap off the extra chocolate against the border of the pot.
- With a firm move, let it slide off the spoon into the wax paper.
- Keep the chocolate balls in the refrigerator, and dip them by batches. Remove 4-5 at a time from the fridge to cover them in chocolate, that will make them easier to handle.
- If you think your chocolate is starting to get a little hard, but it back on your double boiler for a few minutes to keep it completely melted and smooth.
- When you finish coating all of them, you can use leftover chocolate to drizzle on top as decoration, put it inside a sandwich bag and open a small hole to let the chocolate out.
- If you want to use sprinkles as decoration, use them as soon as you have dipped so the chocolate doesn’t set.
Have you made this recipe?
Please let me know how it turned out for you! Leave a comment below and share a picture with the hashtag #thefoodieskitchen
Want more?
You can subscribe to our newsletter and we’ll send you the monthly recipes! You can also keep up to date on Facebook, Twitter, Instagram, Pinterest or Tumblr.
© 2012 – 2020, The Foodies’ Kitchen. All rights reserved | Todos los derechos reservados
This post is also available in / Esta entrada también está disponible en ESPAÑOL (SPANISH)


Comments (1)
Karla
February 13, 2012 at 9:30 pm
Como les dije, estoy obsesionada con su blog. Hoy hice esta receta con mi hijo de 4 años. Además que salieron deliciosas, a él le encantó echar los ingredientes en la batidora y hacer las bolitas!