Little Foodies: Melted Crayon Easter Eggs
This post is also available in / Esta entrada también está disponible en ESPAÑOL (SPANISH)
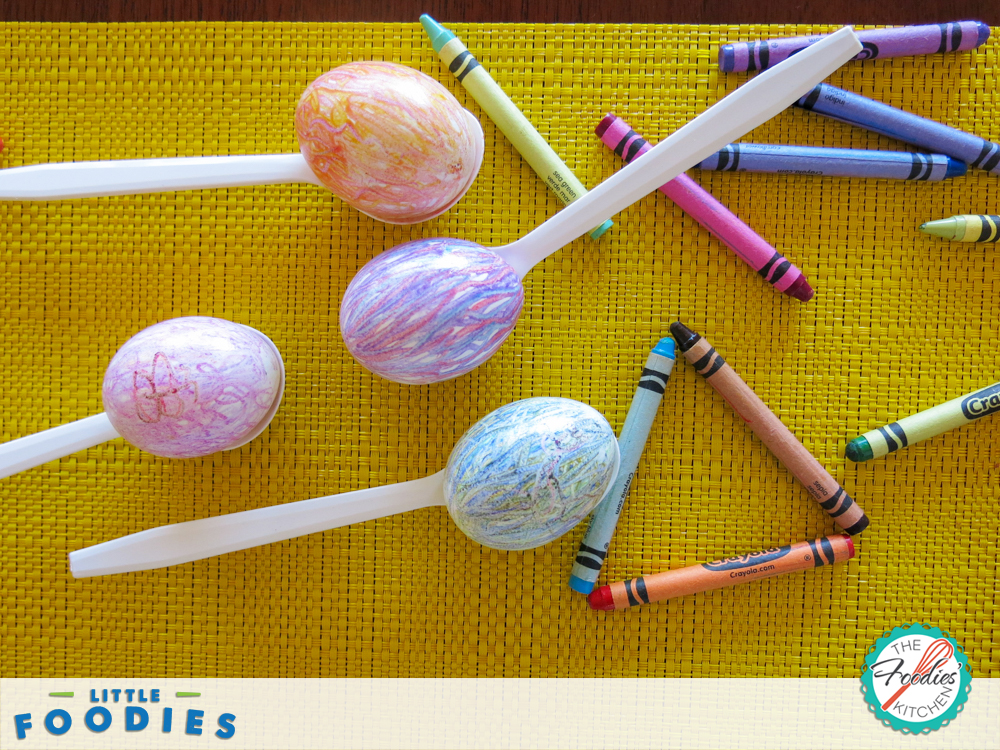
This is the second method we tried to color our easter eggs, all you need are hard-boiled eggs and wax crayons. You have to color them while the eggs are still hot, so the crayons will melt upon contact and you can create beautiful and bright colored designs.
This was probably our favorite method, and it’s perfect if you want a fun but mess-free project to work with your kids. The only tricky part is turning the eggs over to color the other side, so an adult should help with this part, not only because the eggs are hot, but to help the kids keep their egg art intact. The color will smudge until it cools and sets, so you’ll want to hold them with your fingers from the top and bottom sides.
To hold the eggs, we had a plastic egg container, I think it came with our fridge. A great egg holder you can use to let the eggs cool and the colors set is the carton the eggs came in, so don’t throw it out. You can also use plastic spoons to color your eggs, whatever is most comfortable for your kids is best.
If you try this method, we would love to see your kids’ creations!
Kitty & Helga
Melted Crayon Easter Eggs
Method adapted from A Thrifty Mom
You’ll need:
eggs
pinch of salt
1 teaspoon vinegar
assorted wax crayons (use non-toxic brands)
egg carton (to hold eggs)
plastic spoons
tongs
Procedure, Cooking your eggs:
- First, you need to hard-boil your eggs. Set them in a pot of cold water, with at least 1-2 inches of water to cover them. Add vinegar and salt to the water, to help keep the shells intact. Bring the temperature to medium-high.
- Bring pot to a boil, let it boil for 1 minute. Cover the pot, and turn off the heat completely. Let the eggs sit for 10 minutes.
- Carefully, drain the hot water. Pick up the eggs using cooking tongs.
- Let them sit 1 minute, before you start to color.
Procedure, Coloring:
- Set your eggs on the egg carton, leaving a space between them to prevent smudging.
- Start coloring! The wax will melt upon contact with the hot egg. You can also use pastic spoons to hold the eggs while you color. An adult should turn them over carefully, holding the top and bottom of the eggs with their fingers so kids can color the other side, and the design doesn’t get smudged.
- Let them cool.
© 2016 – 2020, The Foodies’ Kitchen. All rights reserved | Todos los derechos reservados
This post is also available in / Esta entrada también está disponible en ESPAÑOL (SPANISH)


